How to Add a Server
Initial Setup:
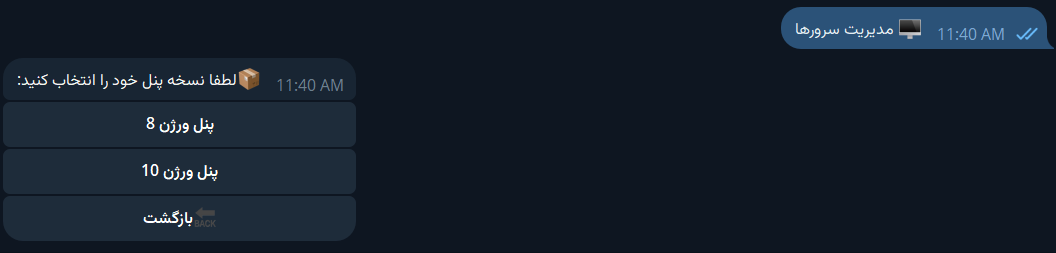
After the initial setup of the bot, you need to add your server. To add a server, first go to the "Server Management" section in the bot management panel and click on the "Add Server" button.

Now, select your panel version from the displayed list.
Install Hiddify API Expanded Script:
Before adding the server, you need to install the Hiddify API Expanded script on your server. Note that server verification by the bot and operations depend on the installation of this script, so it is mandatory.

Installation Command:
sudo bash -c "$(curl -Lfo- https://raw.githubusercontent.com/B3H1Z/Hiddify-API-Expanded/main/install.sh)" After entering the command on the server panel, wait until you see a successful installation message.

Entering Required Information:
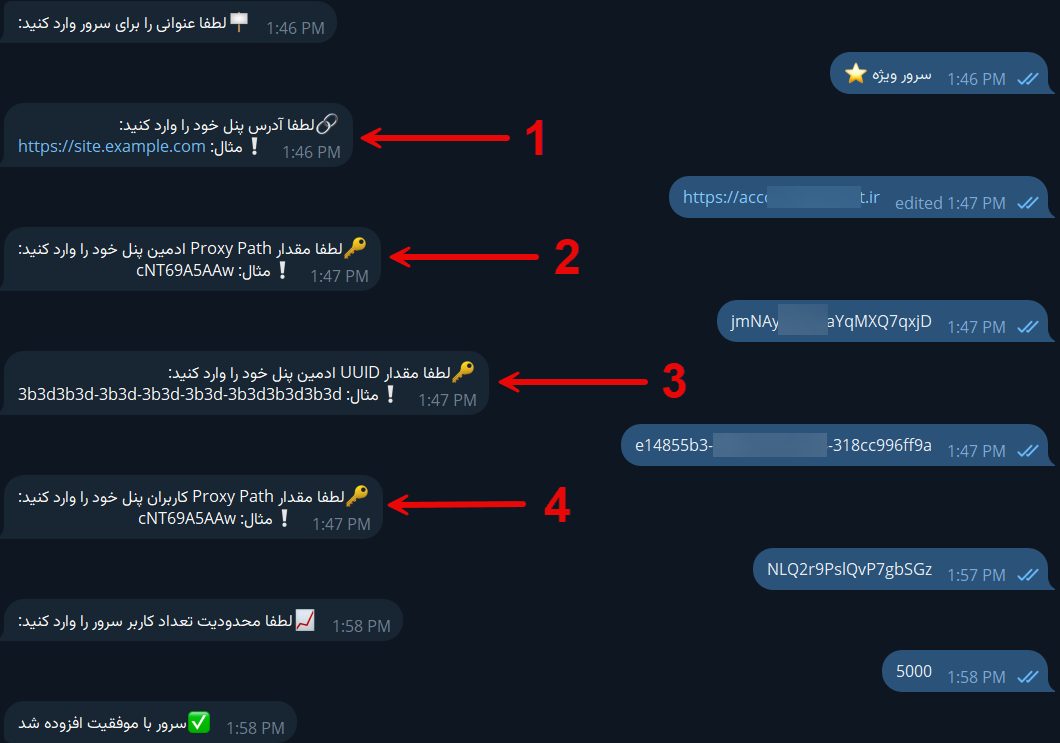
The following details need to be entered to add the server:
- Server Title
- Panel Domain
- Admin Proxy Path
- Admin UUID
- User Proxy Path
- Server Capacity
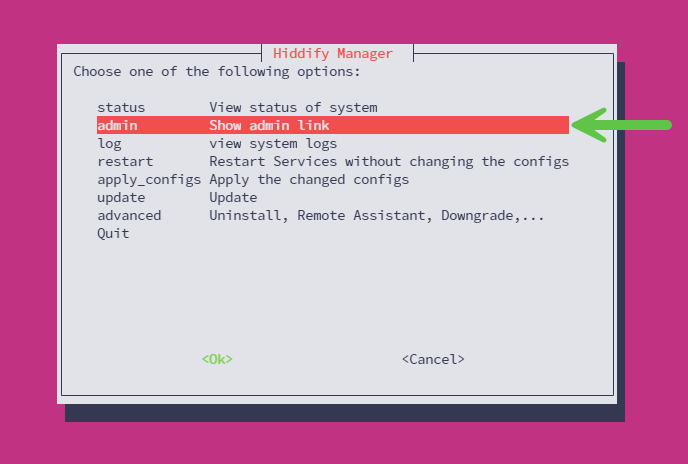
To obtain the domain, Admin Proxy Path, and Admin UUID, you need to log in to your server and select the "admin" option from the Hiddify menu. After entering the admin menu, your panel address will be visible.
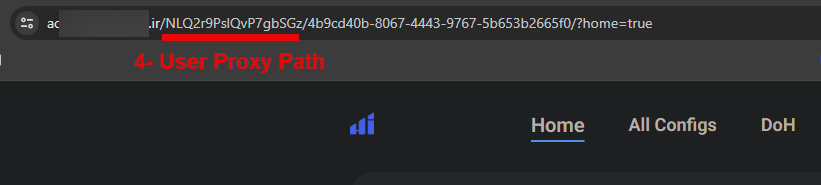
Your panel address consists of three parts separated by slashes, as marked in the image above, indicating which value to enter for the bot’s required information.

- Server Domain
- Admin Proxy Path
- Admin UUID
Next, the bot will ask for the User Proxy Path. To obtain this value, go to the personal page of one of the created subscriptions in your panel, and then enter the specified section in the image for User Proxy Path in the bot.
Finally, the bot will request a value to set a limit on the number of server users. This value is used so that the bot automatically prevents the purchase of new subscriptions once the number of users on your panel reaches this number.
Important Notes:
- The Admin UUID must have Super Admin access level.
- The entered domain address must be direct; do not enter a CDN domain.
Completing the Process:
Once you see the successful addition message, you can view the added server by clicking on the "Manage Server" button with the title you assigned.